What would you do with the big amounts of data that are lying in your production database & using up the storage & slowing down your queries? Data archival will come to the rescue.
Data Archival For Fintechs: A Step-By-Step Guide with AWS DMS
Table of Contents

What would you do with the big amounts of data that are lying in your production database & using up the storage & slowing down your queries?
Data archival will come to the rescue.
In today’s data-driven world, organisations are generating and accumulating massive amounts of data at an unprecedented rate. With the country’s digital infrastructure being extremely robust owing to the India stack, the next wave of innovation must enhance the existing solution. Suppose the presence of fintech is driven by access. In that case, the future will be rooted in prediction, whether it is data-driven decision-making for product development or creating more tailored and relevant offerings via behaviour analysis. Fintech companies must continue harnessing data’s power to predict customer needs, anticipate market trends, and make informed decisions. This data-driven evolution will undoubtedly shape the future of fintech in India within the $200 billion market size. As data volumes continue to grow, it becomes increasingly essential for businesses to implement effective data management strategies, including data archival.
Data archival involves systematically storing and preserving data that is no longer actively used but may still hold value for compliance, historical analysis, or future reference. In this blog post, we will explore the importance of data archival and highlight best practices for implementing a successful data archival strategy.
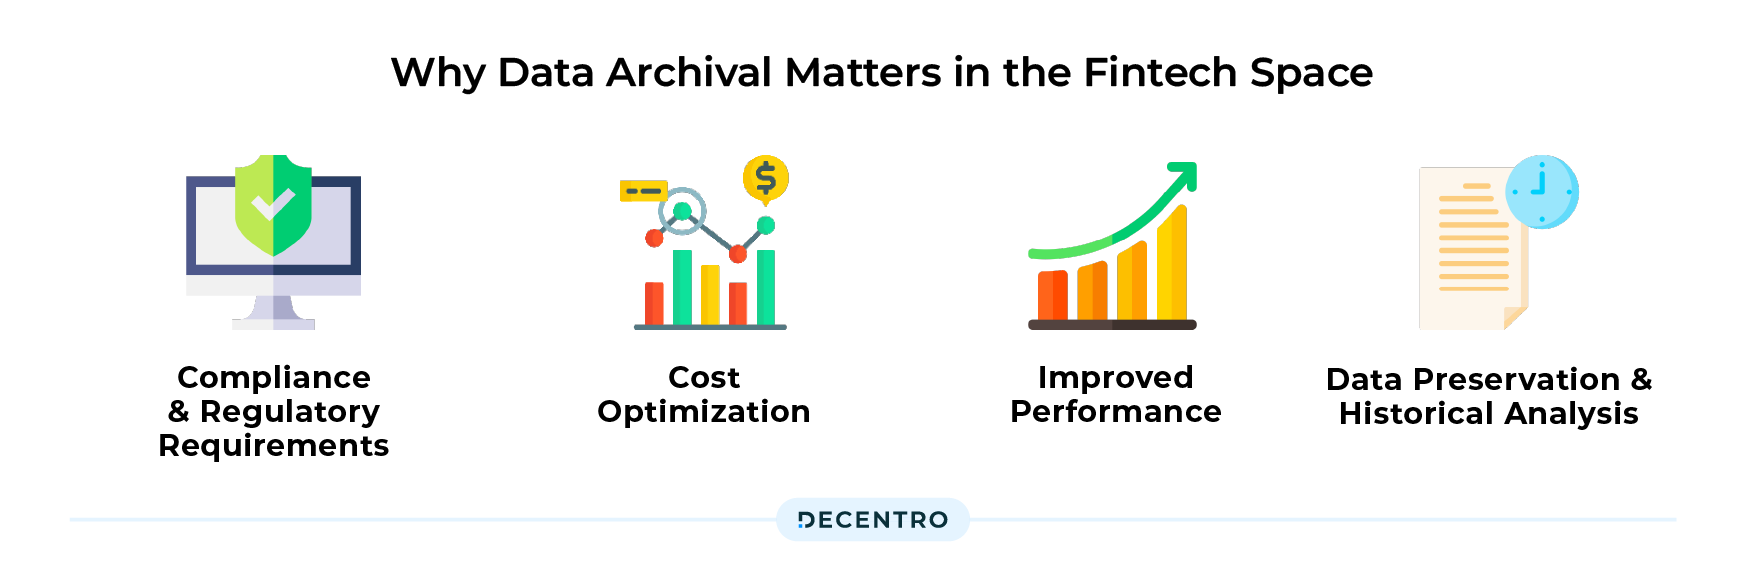
Why Data Archival Matters in the Fintech Space
Data archival is indispensable for fintech companies to comply with regulations, support business operations, enable data-driven decision-making, and provide superior customer experiences. It forms the foundation for regulatory compliance, risk management, and effective governance while also serving as a valuable asset for analytics, dispute resolution, and strategic planning. Emphasizing the importance of data archival ensures that fintech companies maintain a competitive edge, build trust with customers, and thrive in the rapidly evolving digital financial landscape through
- Compliance and Regulatory Requirements: Industries such as Banking and Finance, have strict compliance and regulatory requirements for data retention. Archiving data helps organisations meet legal obligations by preserving data for a specified period as mandated by industry-specific regulations.
- Cost Optimization: Storing large volumes of data on primary storage systems can be expensive. By implementing a data archival strategy, organisations can move less frequently accessed or non-critical data to lower-cost storage tiers, freeing up valuable resources on primary storage and reducing operational costs.
- Improved Performance: Archiving infrequently accessed data from primary storage can significantly improve system performance. As the historical data will be removed from the primary storage, the query performance will also be improved.
- Data Preservation and Historical Analysis: Archiving data allows organisations to preserve historical records, enabling them to perform trend analysis, conduct research, support audits, and gain valuable insights from past data. It can be valuable for long-term business planning & decision-making.
So up until now, you would have understood the importance of Data archival, but how should it be done effectively & efficiently?
Enter AWS Data Migration Service!
What is AWS DMS & why choose it to archive data
AWS Data Migration Service is a fully managed service provided by Amazon Web Services. It enables businesses to migrate their data seamlessly and securely between various sources, including databases, data warehouses, and other AWS services.
In the case of Decentro, the source is our production MySQL database & the target is Amazon S3.
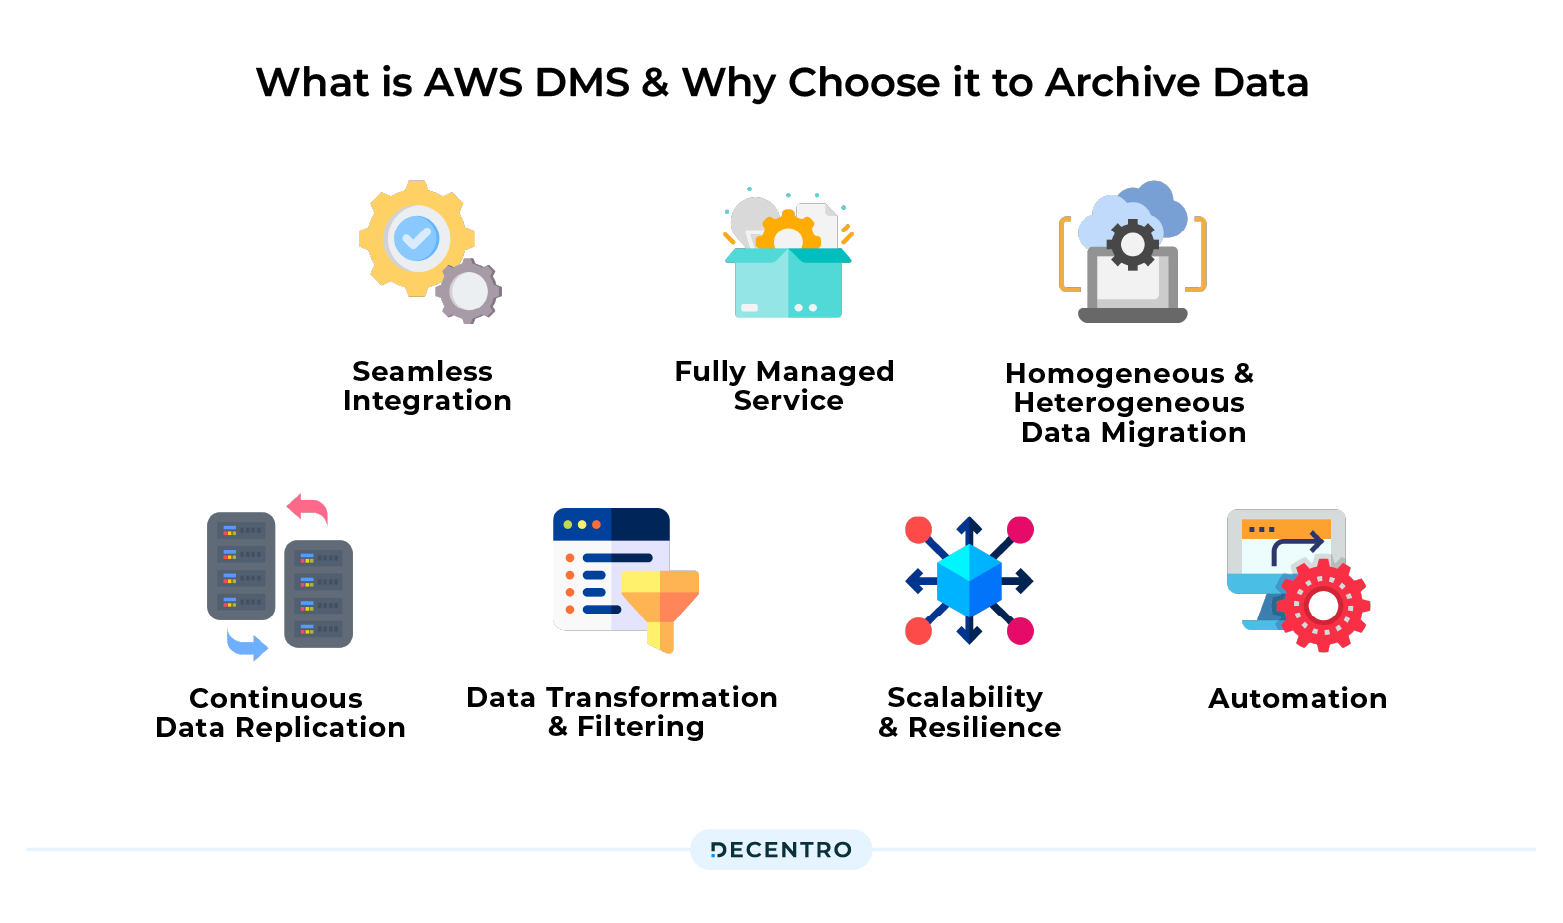
AWS DMS provides the following benefits:
- Seamless Integration: AWS DMS seamlessly integrates with various data sources, including on-premises databases, Amazon RDS, Amazon Redshift, and more. This ensures compatibility with your existing infrastructure, allowing a smooth transition from archiving data to AWS storage services.
- Fully Managed Service: AWS DMS is a fully managed service that handles the complexities of data migration and archival. It eliminates the need for manual scripting or data transfer tasks, freeing up valuable time and resources for your organisation.
- Homogeneous and Heterogeneous Data Migration: AWS DMS supports both homogeneous and heterogeneous data migration, allowing you to archive data between the same or different database engines. This flexibility enables organisations to migrate data from legacy systems or cloud providers to AWS storage services effortlessly.
- Continuous Data Replication: With AWS DMS, you can achieve continuous data replication during archival. It captures changes made to the source database and replicates them to the target storage in near real-time, ensuring data integrity and minimising potential data loss.
- Data Transformation and Filtering: AWS DMS offers data transformation capabilities, allowing you to modify data structures or formats during the archival process. You can also apply filters to select specific datasets for archiving, further optimising storage usage and reducing costs.
- Scalability and Resilience: AWS DMS is designed to handle large-scale data archival projects, accommodating datasets of any size. It automatically scales resources to match the workload, ensuring optimal performance and reliability during the archival process.
- Automation: AWS DMS tasks can be automated by using an AWS Lambda function which will execute the task & which can further be scheduled using Amazon Eventbridge.
AWS DMS sounds perfect for handling data archival activity.
Let’s take a look at how this process will be done.
Steps to archive data using AWS DMS
We will use the AWS console to set up the data migration task.
- Creating a replication instance
Log in to the AWS console, go to the Data Migration Service section, and click on the Replication instances in the Migrate data section on the left pane.
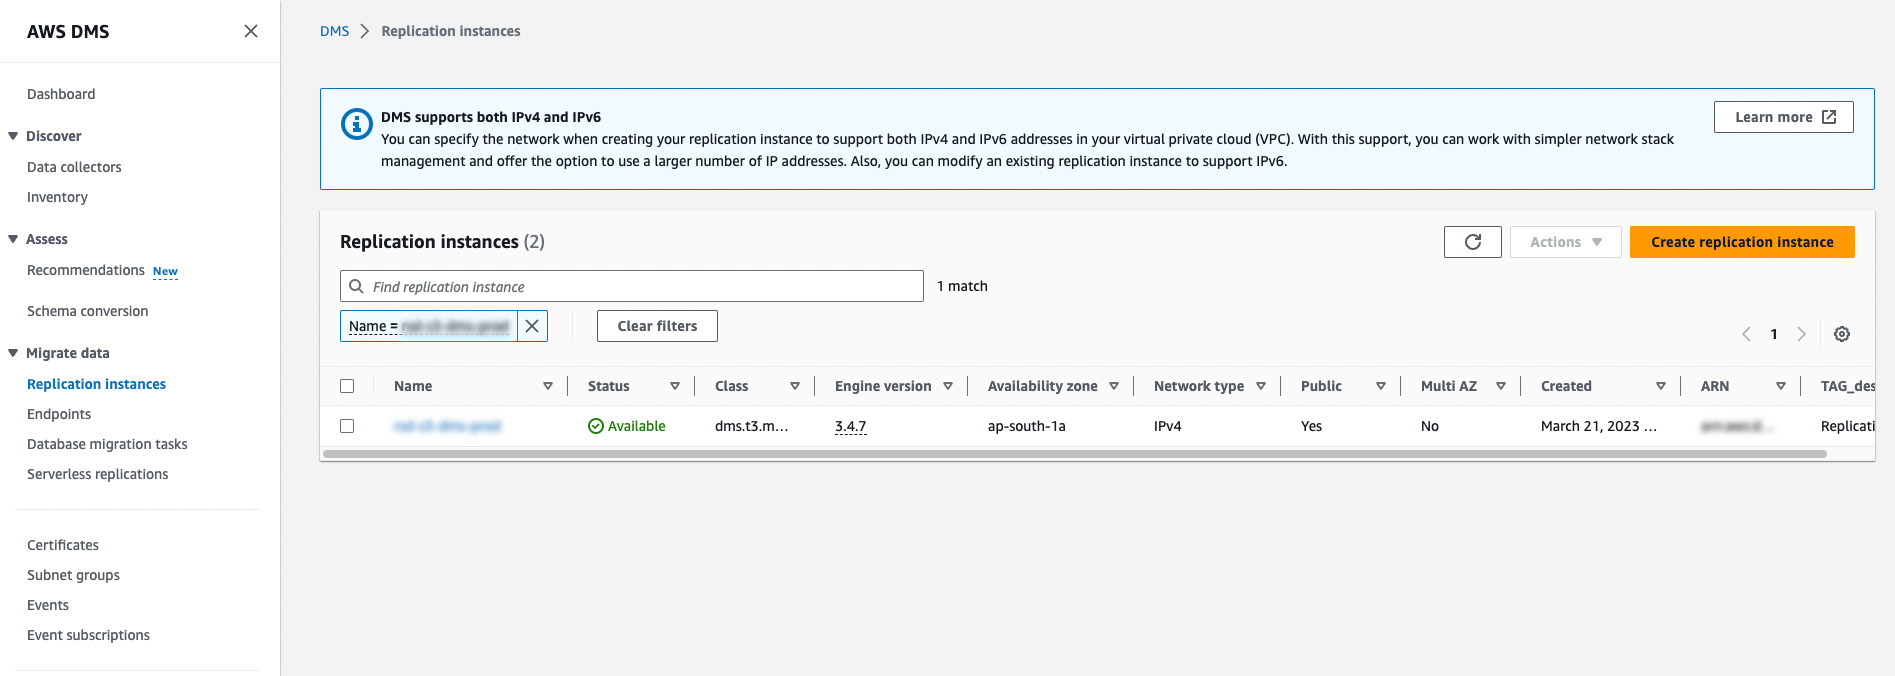
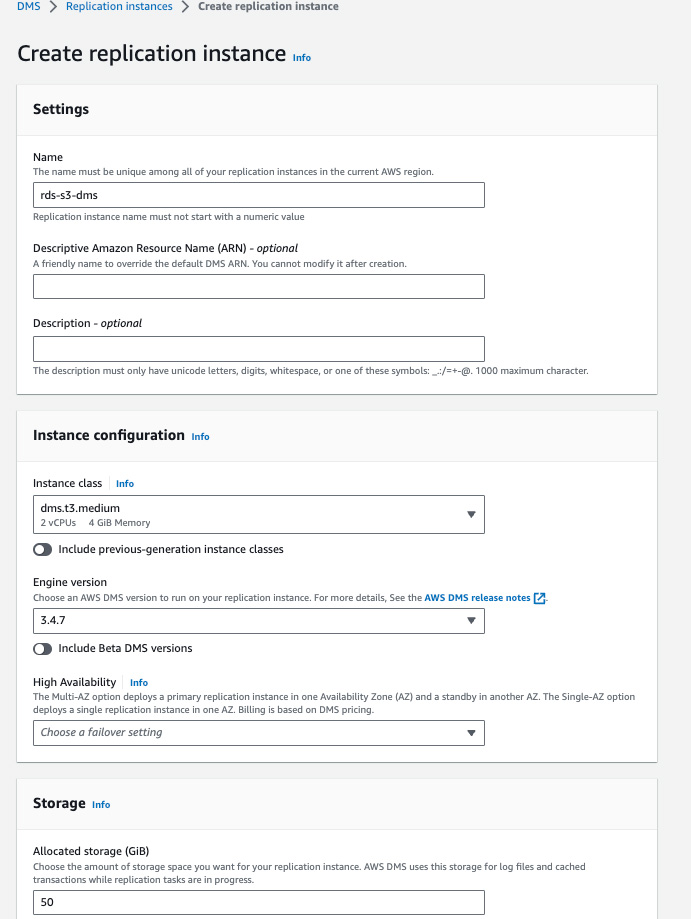
Click on the Create replication instance button & fill in the required fields.
Select the Instance Configuration & AWS DMS version based on your production workload. Also, select the failover setting as Multi-AZ or Single-AZ in the High Availability option.
Select how much Storage you want to allocate to your replication instance.
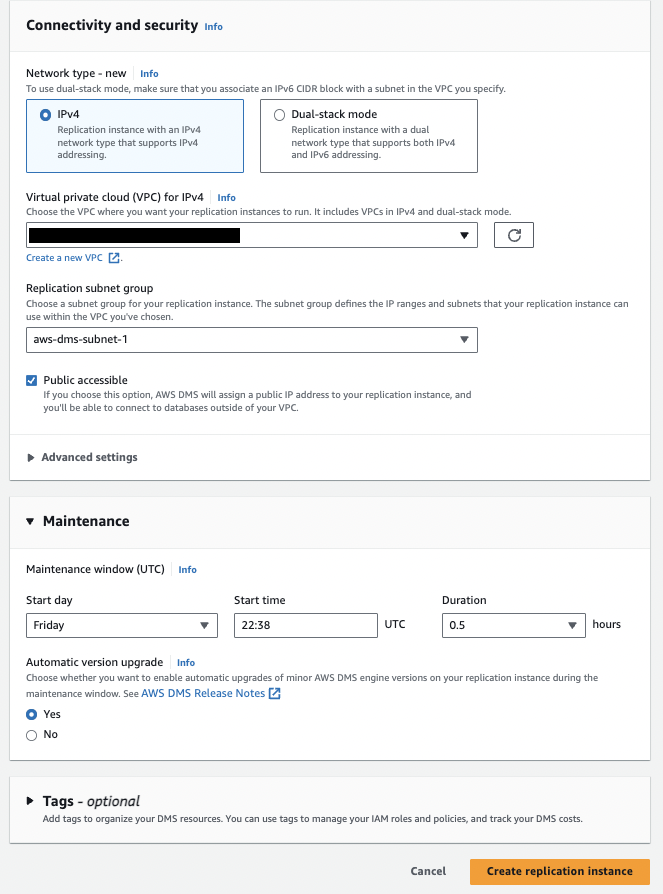
Choose the VPC & Subnet on which you want your replication instance to run.
Choose the weekly maintenance time in the Maintenance window at which AWS will automatically perform an OS update, security patch update & AWS DMS version update.
You can also add Tags to your replication instance based on your requirements.
Verify the selected configuration, And click on the Create replication instance button. AWS will take some time to configure the instance.
- Creating a source endpoint
In this step, we will create a source endpoint from which the data will be migrated.
And we will be using MySQL RDS as our source endpoint.
To create endpoints, click on the Endpoints in the Migrate data section on the left pane. Then click on the Create Endpoint button.
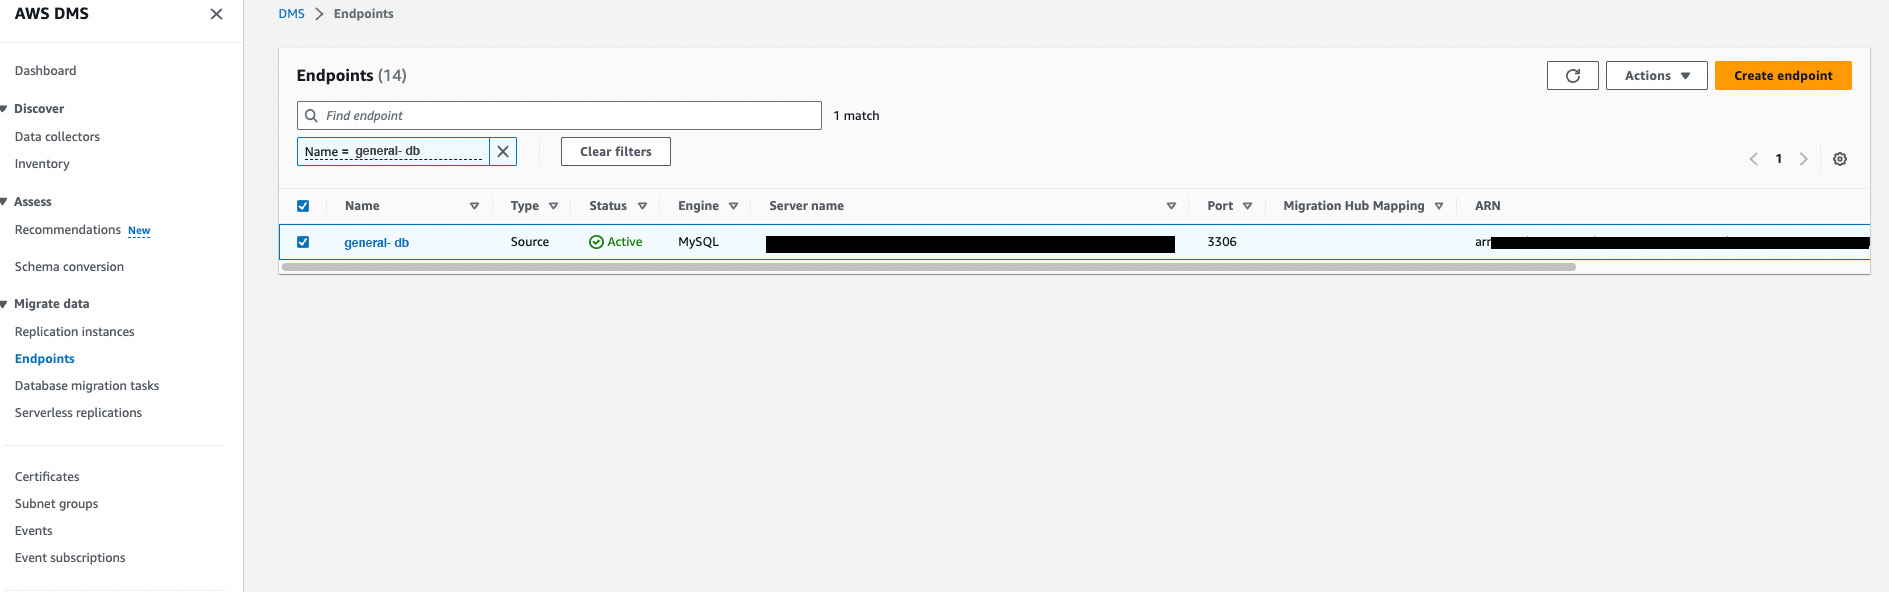
For creating a source endpoint, select the Source endpoint radio button & select the RDS DB instance checkbox & select the RDS instance from the dropdown.
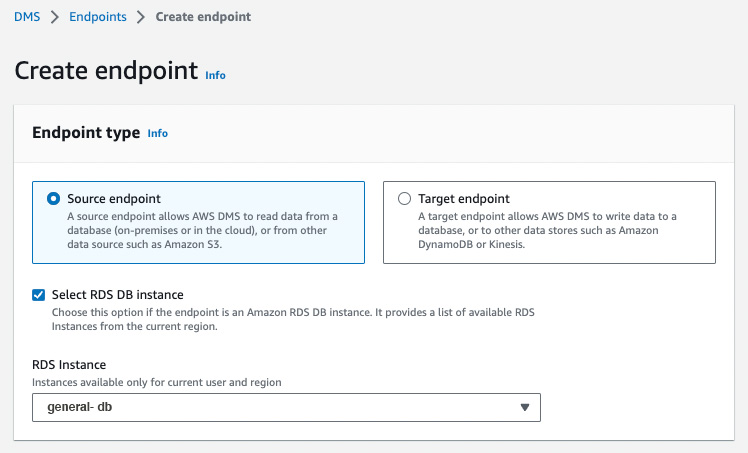
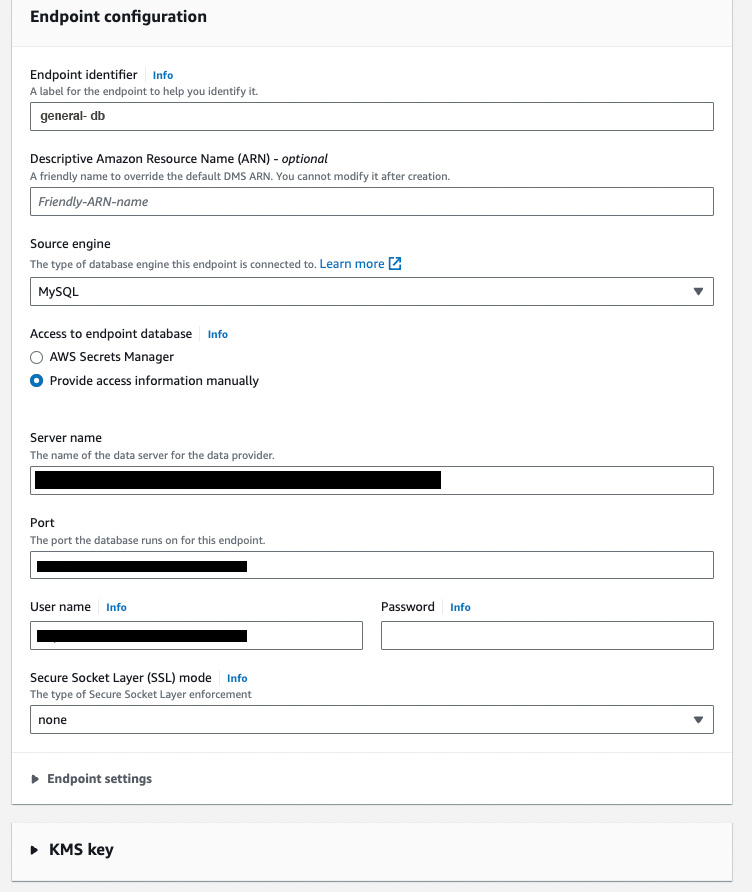
In the Endpoint configuration tab, add an identifier for the endpoint & select the source engine. In this example, we have chosen MySQL.
To access the database, you can use AWS Secrets Manager or manually provide the required credentials. In this example, we have manually provided the credentials.
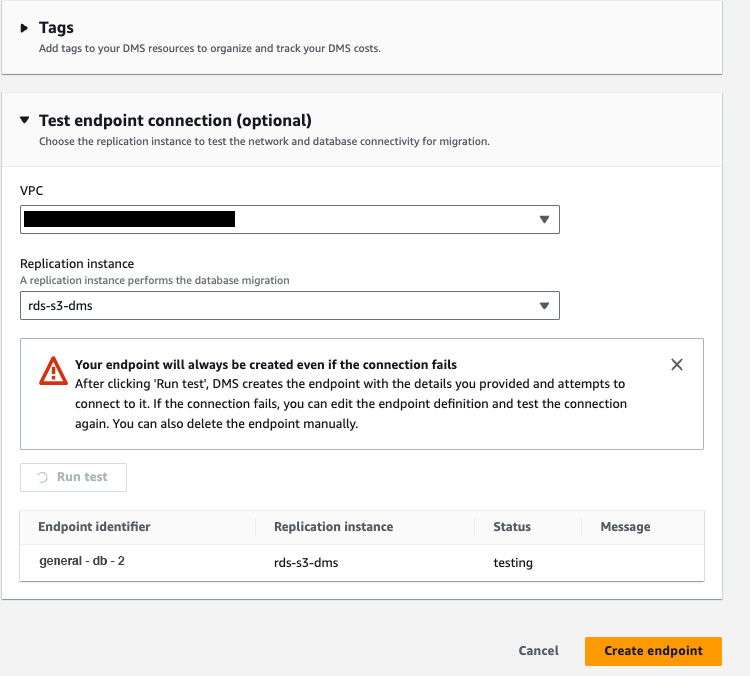
After adding the credentials, it is always advisable to test the connection, so select the VPC & the replication instance you created in the previous step & run the test. After receiving the successful status, click on Create Endpoint button to create a source endpoint.
- Creating a target endpoint
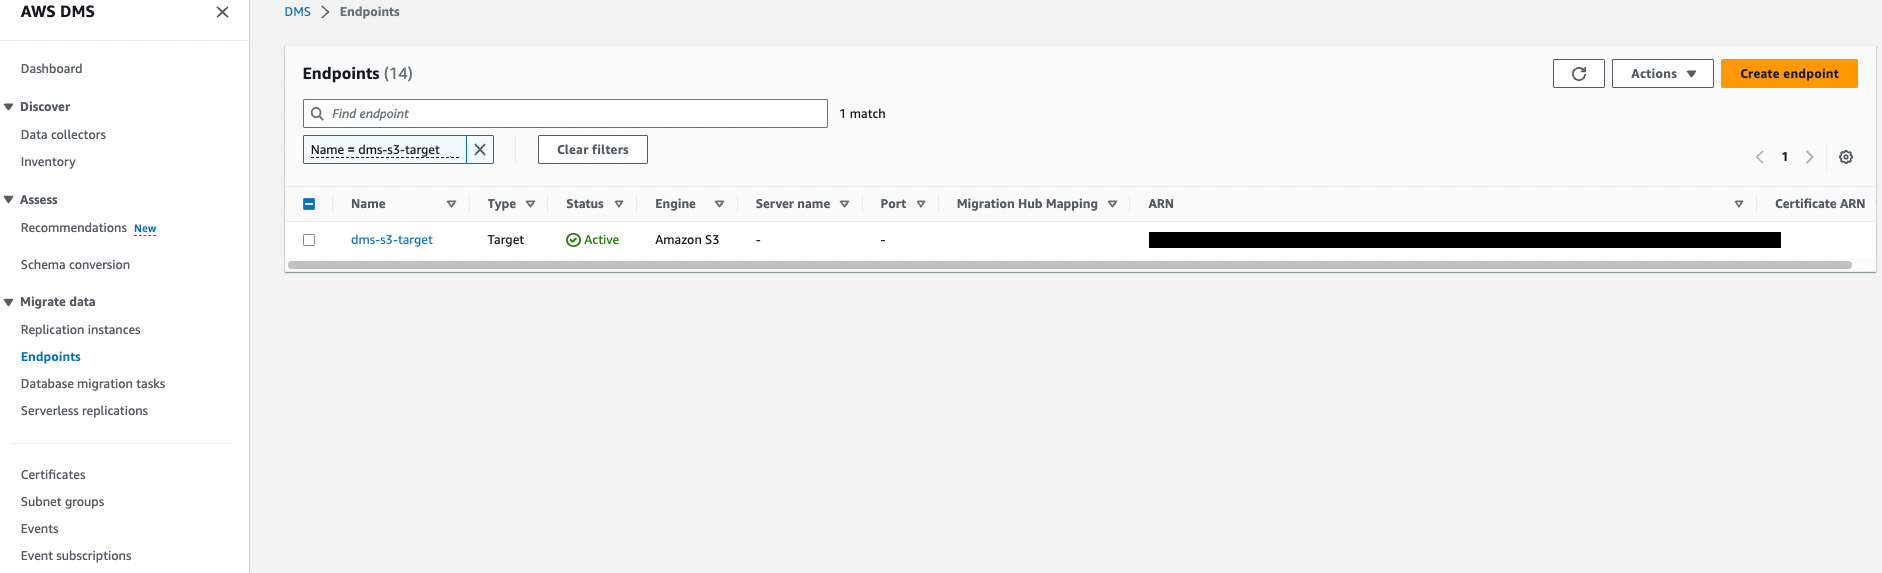
Similar to the source endpoint, we will be creating a target endpoint, to which the data will be stored after migration. In the Endpoints dashboard, click on the Create Endpoint button.
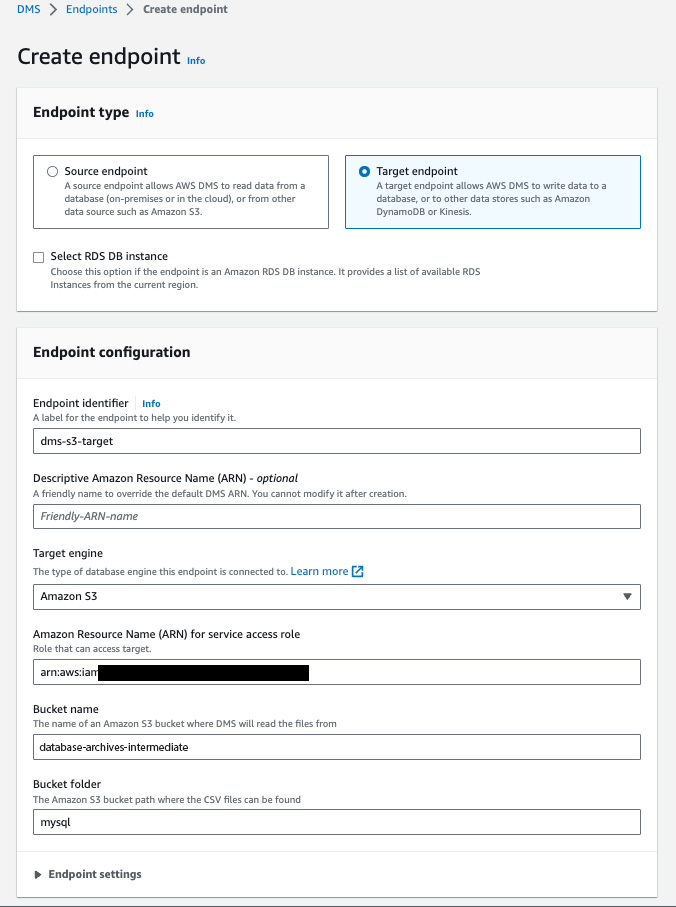
For creating a target endpoint, select the Target endpoint radio button.
In the Endpoint configuration tab, add an identifier for the endpoint & select the source engine. In this example, we have chosen Amazon S3. If we select S3, the migrated data will be stored in CSV file format by default. It can also be changed to Parquet file format based on your requirement.
Add the ARN of the service role to access the S3 bucket. And add the Bucket name & the Bucket folder into which the data should be stored.
In the Endpoint settings section, you can configure additional settings that you would like to have in the migrated data. Here, we are using the Wizard to add settings in a key-value format.
Based on AWS’s recommendations, you can also use Extra Connection Attributes & they should be added semicolon-separated.
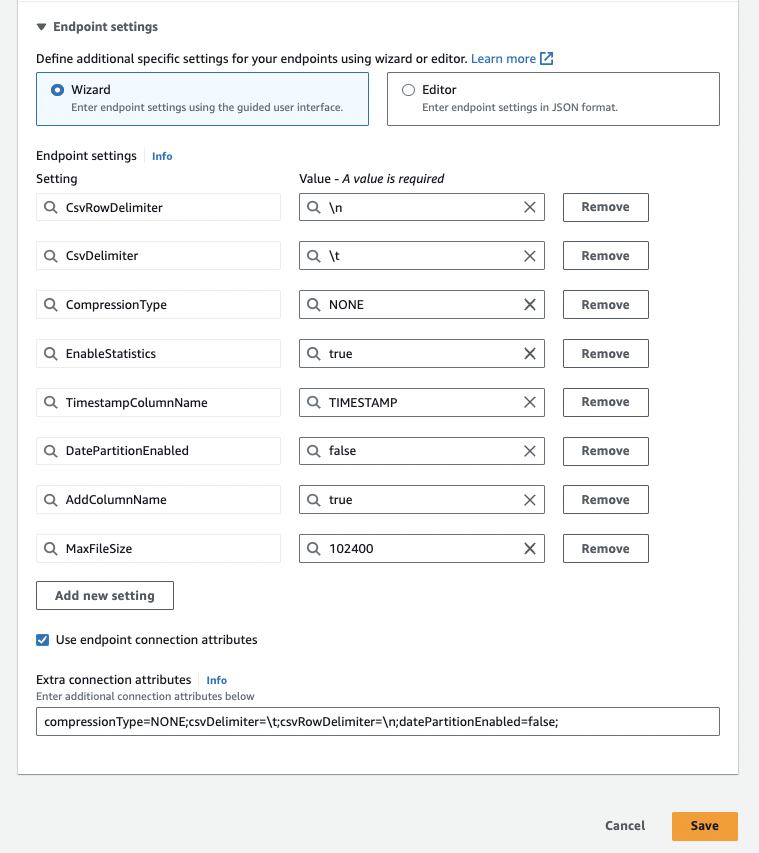
After all the settings are added, you can click on the Save button to create a target endpoint.
- Creating a database migration task
The last step is to create a database migration task which will actually migrate the data from the source to the target endpoint.
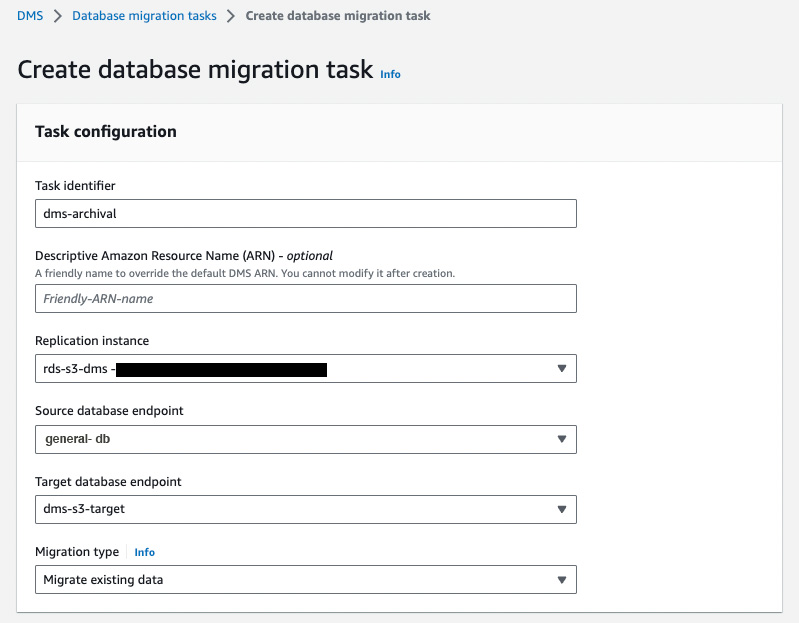
To create a DMS task, click on the Database migration tasks in the Migrate data section on the left pane. Then click on the Create task button.
In the Task configuration section, add the Task Identifier & select the Replication instance, source & target endpoints we created before.
In the Migration type, you can select from the following three options based on your requirement:
- Migrate existing data (Full load Only) – Perform a one-time migration from the source endpoint to the target endpoint.
- Migrate existing data and replicate ongoing changes (Full load and CDC) – Perform a one-time migration from the source to the target, and then continue replicating data changes from the source to the target.
- Replicate data changes only (CDC only) – Don’t perform a one-time migration, but continue replicating data changes from the source to the target.
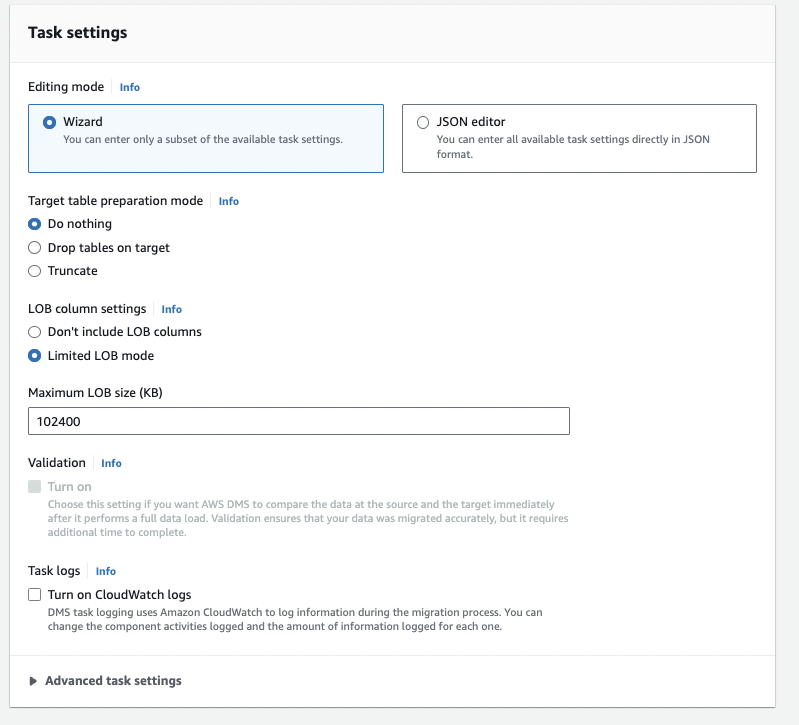
In the Task Settings section,
Firstly, select the Target table preparation mode from the following based on your requirement:
- Do nothing – if the tables already exist at the target, they remain unaffected. Otherwise, AWS DMS creates new tables.
- Drop tables on target – AWS DMS drops the tables and creates new tables in their place.
- Truncate – AWS DMS leaves the tables and their metadata in place but removes the data from them.
Note: Do Nothing target preparation mode creates a table if the target table doesn’t exist.
In the LOB columns settings, there are the following options:
- Don’t include LOB columns: AWS DMS ignores columns or fields that contain large objects (LOBs).
- Limited LOB mode: AWS DMS truncates each LOB to the size defined by “Max LOB size”. (Limited LOB mode is faster than full LOB mode.)
- Full Lob mode: AWS DMS fetches the LOB data in chunks as specified in “Lob Chunk Size”.
If you select Limited LOB Mode for the above, define a Maximum LOB size in KBs.
You can Turn on Cloudwatch logs to log all the activities performed by AWS DMS, which will help debug issues if there are any.
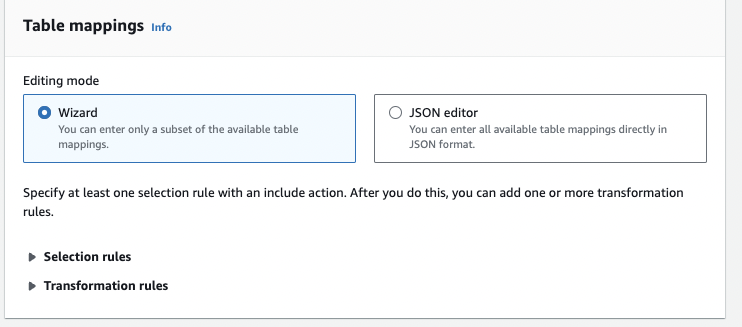
In the Table mappings section, you can define Selection rules & Transformation rules.
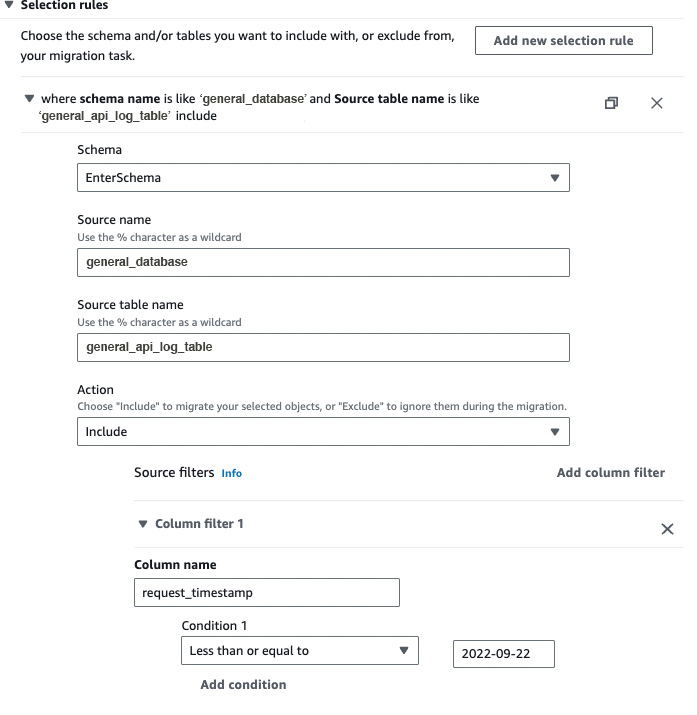
In the selection rules tab, you can add the rules which will be applied during the migration process. You must enter the database schema name in the Source name field & table name in the Source table name field. And in the Action field, you can select either Include or Exclude, which as the name suggests, will include or exclude the table from the migration respectively.
We have added General_Database as our source schema & General_Api_Log_Table as our source table. And we have added the Action as Include, meaning the DMS will only include the General_Api_Log_Table table during the migration.
Furthermore, you can add source filters on columns of a table.
Here, we have added a filter on the request_timestamp column & the condition is Less than or equal to, which means only the rows with request_timestamp <= 2022-09-22 will be migrated.
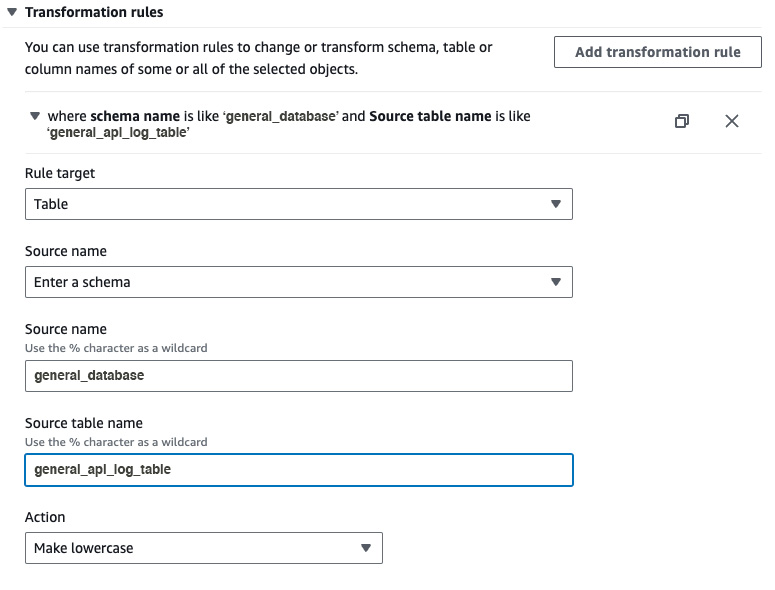
After creating at least one selection rule, you can add transformation rules to the task so the data selected based on the selection filter will be transformed according to the rules provided.
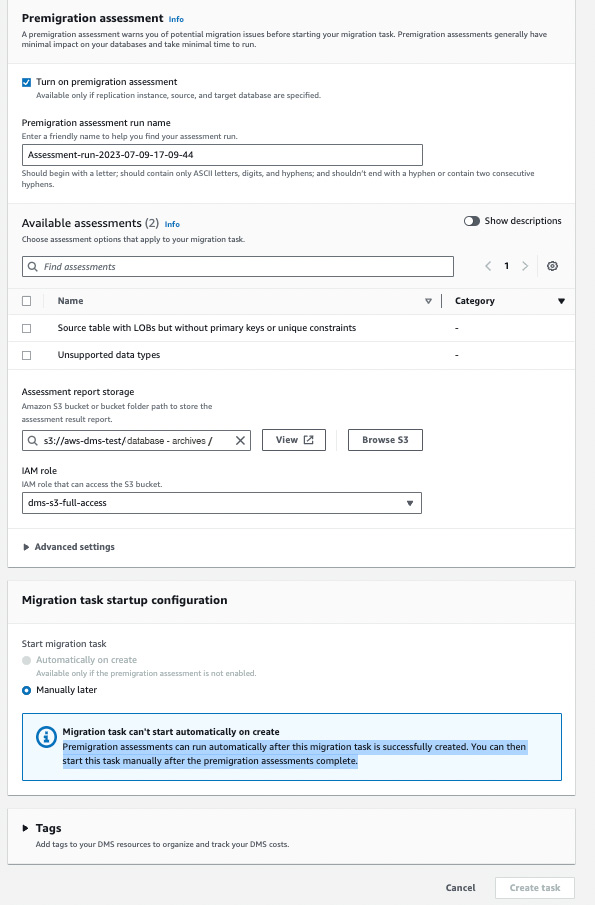
You can also enable Premigration assessments, which will run before the DMS starts the migration. They are helpful in finding any schema or data-related issues.
You can also add Tags if you want to map anything with the DMS task.
As we have selected the premigration assessment, we will manually run the DMS task after the evaluations are executed successfully.
After all the above configurations are done, click the Create Task button. It will take some time to create the task & you will receive a notification on the AWS console after it is created successfully.
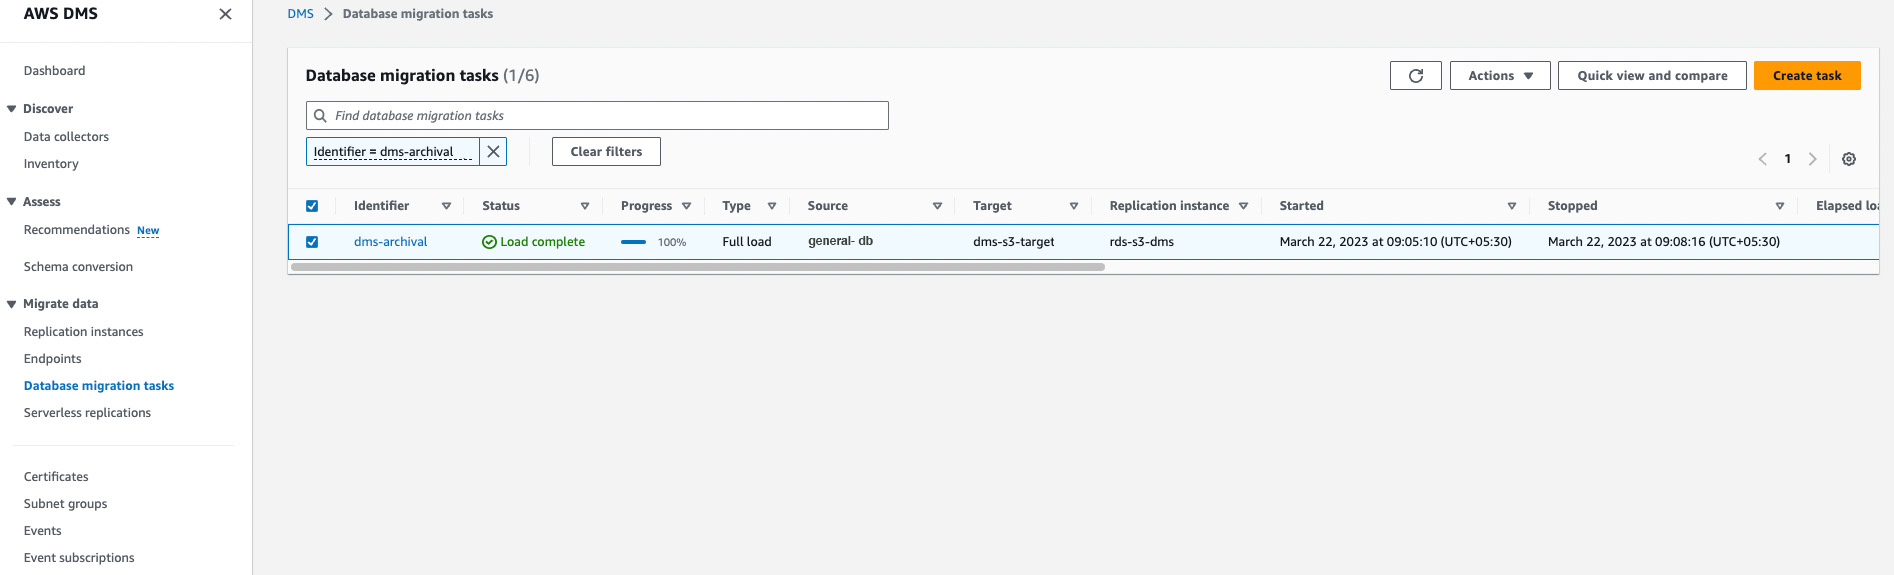
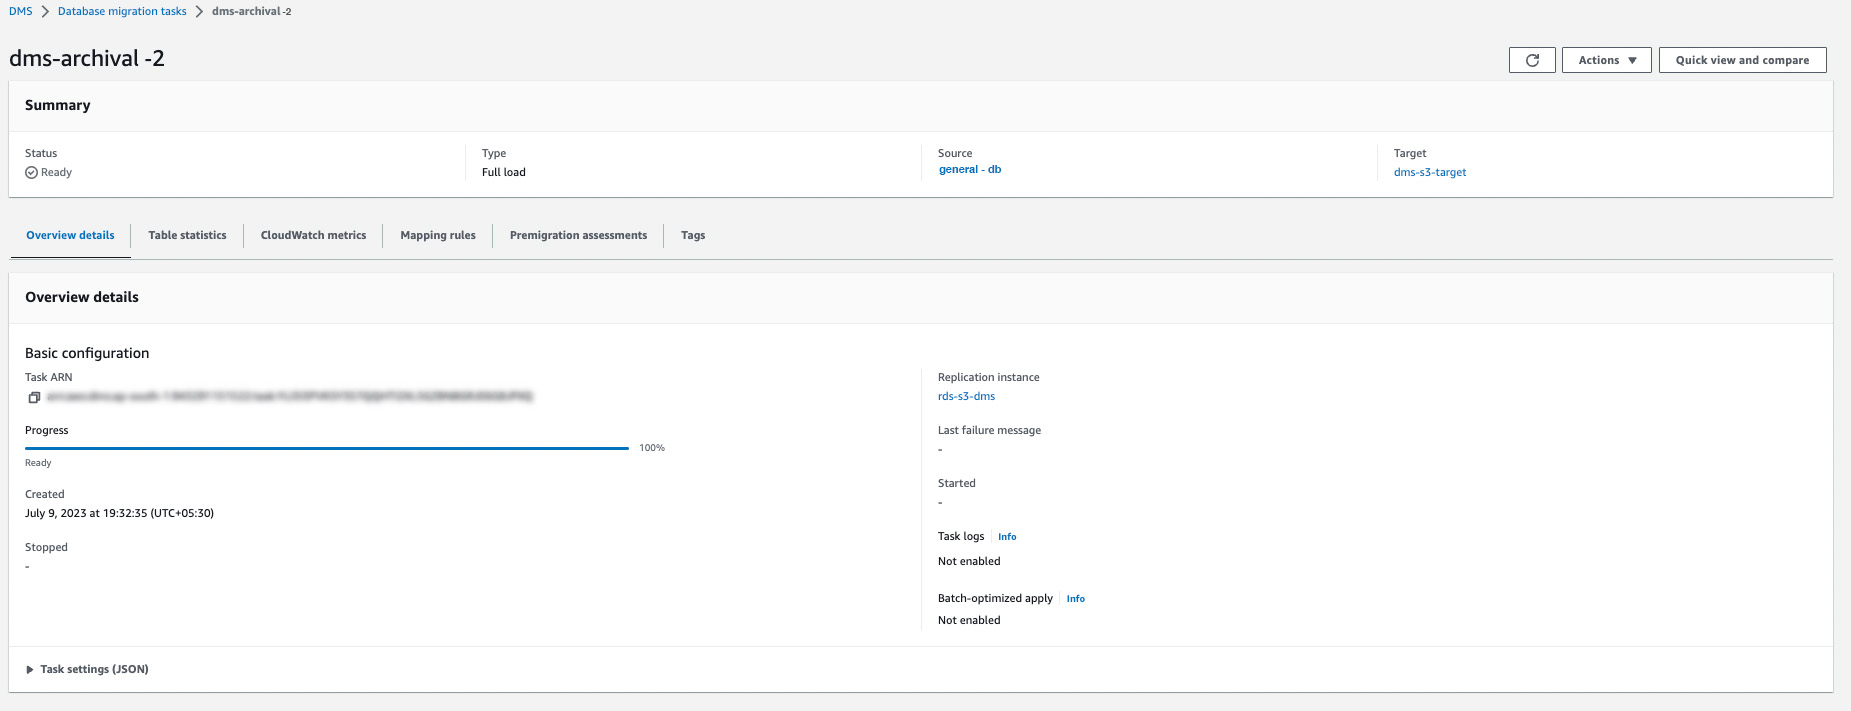
After the task is created successfully, it will be visible on the dashboard.
- Executing a database migration task
Firstly, after the task is created, you should run the premigration assessments & the following result will be displayed upon successful completion:
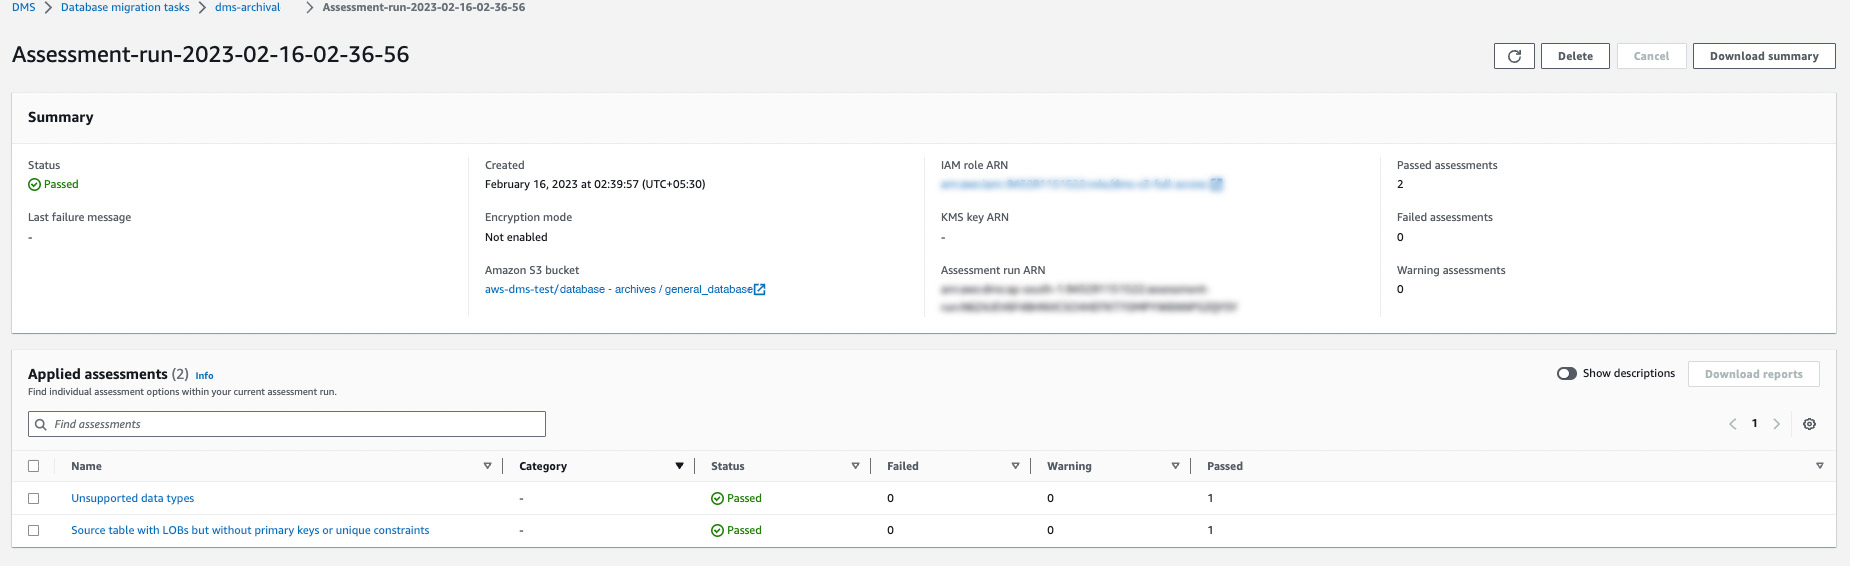
This step is required because we selected the [Manually later]option while creating the DMS task. If the [Automatically on Create] option were selected the task would have been started automatically after it was made.
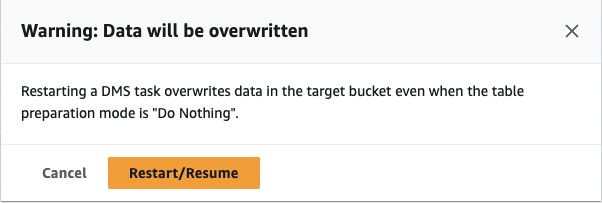
So to execute the DMS task, click the Actions dropdown and select the Restart/ Resume option.
Upon clicking the above button, you will receive a Warning message, so if you have any data in the s3 bucket, you will have to move it; otherwise, that data will be overwritten. After careful verification, you can click on the Restart/Resume button.
You will be able to see the status as Starting. After some time, that status will be updated to Running.


After some time, the DMS archival task will be completed & the status will be updated to Load complete & you will be able to see the number of rows it has archived. Here, it shows 441,477
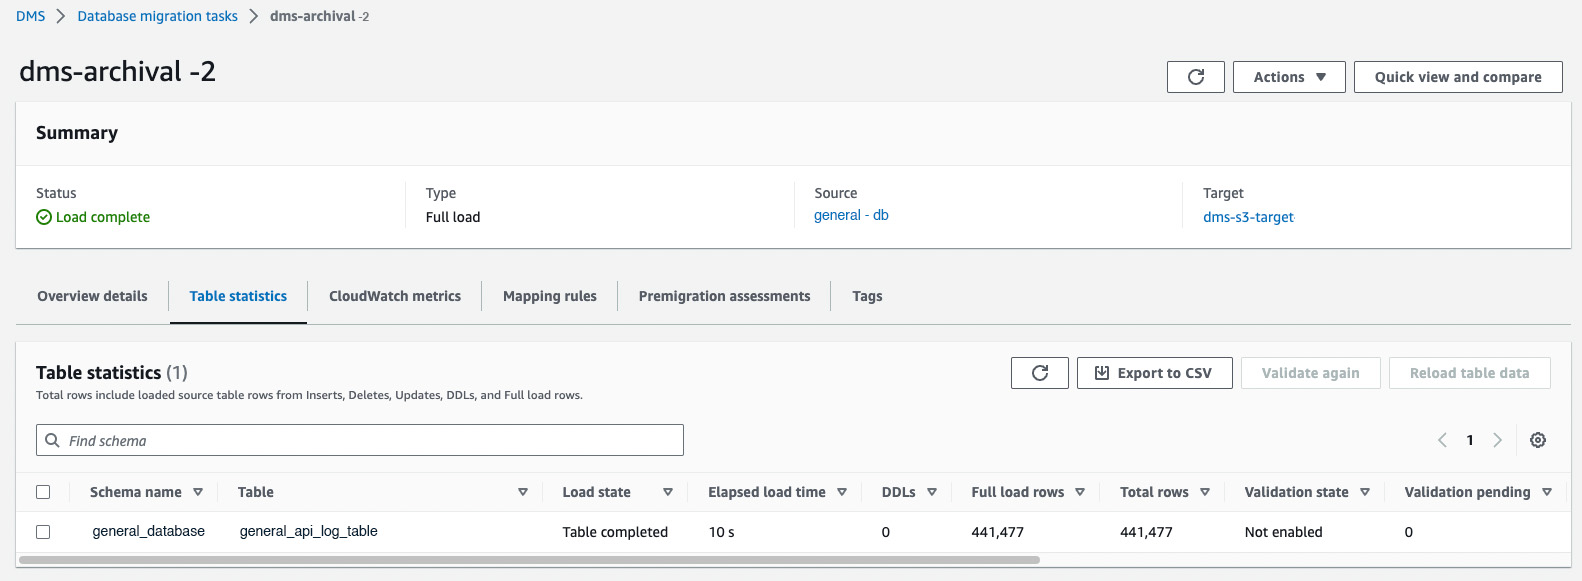
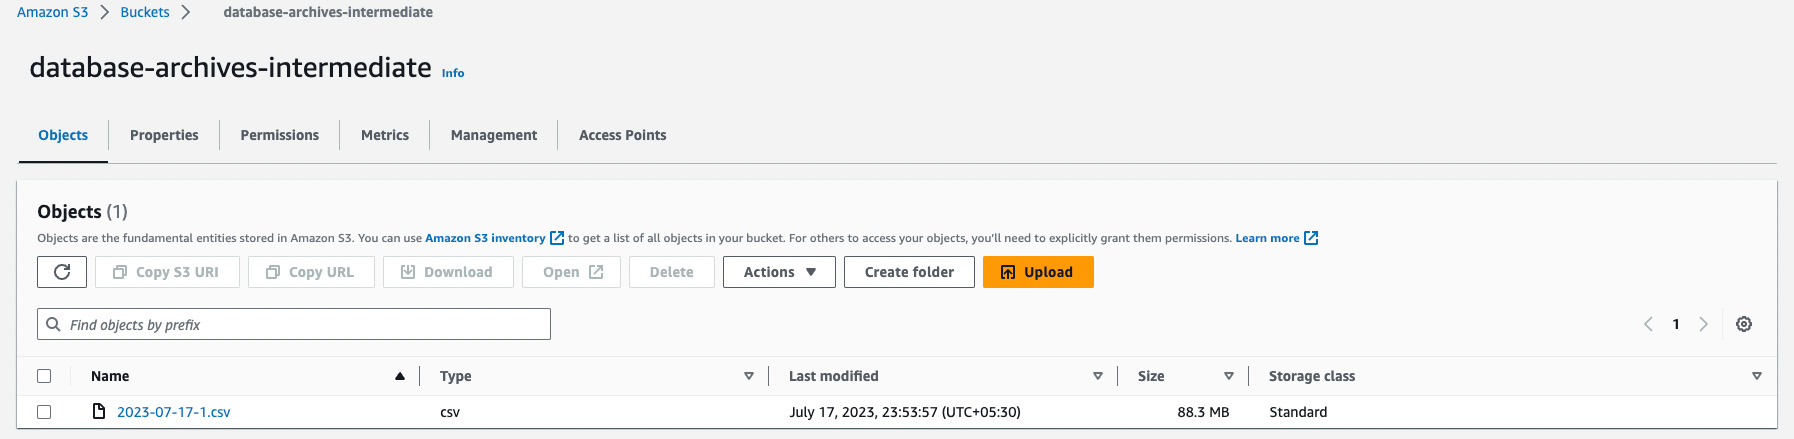
As we selected the target endpoint as an Amazon S3 bucket, we will be able to see the archived data in CSV format, which ends the data archival process.
Next steps
This archival process can be automated using AWS Lambda functions which can update the mapping rules for the tables & Amazon Eventbridge, which can run the Lambda functions at regular intervals based on the rules that you provide.
Suppose you want to query the archived data. In that case, you can use AWS Glue, which will automatically create a database & the corresponding table schemas based on the CSV files. It can be further integrated with Amazon Athena, giving you a platform to write SQL queries on top of it.
The diagram below shows the workflow we use at Decentro for data archival.
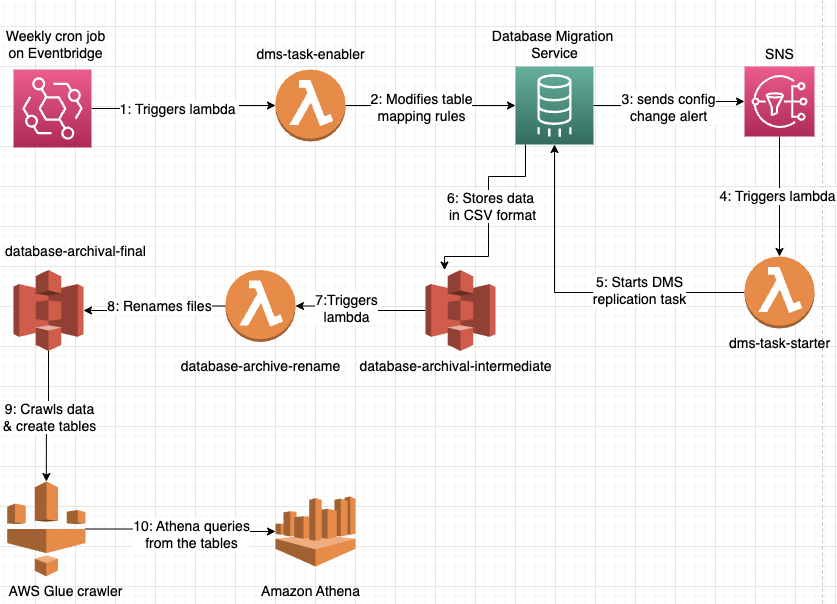
- Consuming this, we can archive the data from our tables automatically & this process runs every week.
- It has helped in cleaning the historical data from our production database, which was lying there for a long & was consuming space which was not required.
- It has helped us to save our storage costs & there has been a significant reduction in query times for our dashboard & analytics.
- On top of that, we have integrated Decentro’s internal BI and data visualisation service with Amazon Athena so that our team can query the historical data if needed.
Conclusion
Efficient data archival is essential for organisations to optimise storage costs, meet regulatory compliance requirements, and preserve valuable historical information.
AWS Data Migration Service (DMS) simplifies the process of archiving data to AWS storage services, offering seamless integration, continuous data replication, data transformation capabilities, and scalability. By leveraging AWS DMS for data archival, organisations can achieve cost-effective, secure, and scalable storage solutions while ensuring the accessibility and integrity of their archived data. A use case we were able to witness first-hand at Decentro.
We have also collated an exhaustive set of blogs on the tools we have used in the past for an effective development lifecycle. Feel free to check it out. We have previously covered topics like JsPDF, Locust, and much more.